♥My Blinkies♥


♥I CT For♥

♥Forums♥


♥Blogs I Stalk♥


♥Fav Tube Sites♥


♥Fav Stores♥


Showing posts with label Dees'Sign Depot Kits. Show all posts
Showing posts with label Dees'Sign Depot Kits. Show all posts
Thursday, 6 November 2014
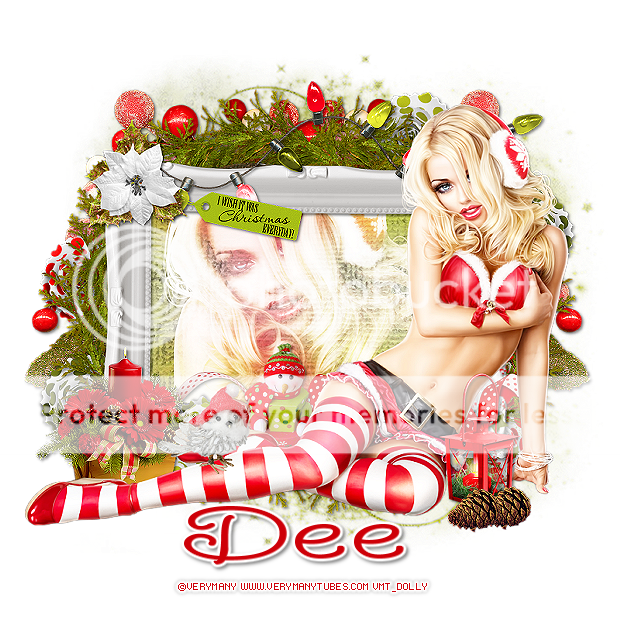
~Supplies Needed~
Tube ~ I'm using the awesome artwork of Verymany, which you need a licence to use & can get here ~ Verymany Tubes
Scrapkit ~ Christmas Cheer Collab PTU by Foxy & Dee here ~ Digi Foxy's Studio or Dees'Sign Depot For this tut I'm using Dee's part
Filters ~ Xero Radiance, Noise, drop shadow of choice
Font ~ FFF Urban, TwinkleStarROB
Mask of choice
~Lets Begin~
New raster layer 800x800
Paste Frame1b as new layer, resize 70%, click inside with magic wand, expand 7 & paste paper2 as new layer, resize 70%, invert delete. Paste close up of tube as new layer, resize if needed, delete, select none. Xero Radiance - Beauty 150
Paste Elem18 as new layer, drag below Frame & resize to suit so that its showing just above top of frame. Dupilcate mirror, merge down
Paste Elem's 26a, 26b &26 c as new layers, resize to suit & place around Frame drag them all behind, merge down & add drop shadow of choice
Paste Elem22 as new layer, resize to suit, so it fits along top of Frame, duplicate & change blend mode to screen on duplicated layer, merge down
Paste Elem3 as new layer along bottom of Frame, resize to suit, flip & drag back down
Paste Elem20 as new layer, resize to suit & place on left side of frame
Paste full tube as new layer, resize to suit, duplicate & change blend mode to screen on duplicated layer, merge down
Paste Elem11 as new layer, resize to suit & place behind Tube
Paste Elem1 as new layer, resize to suit & place on right side of tube
Paste Elem9 as new layer, resize to suit & place in front of Elem1, duplicate & move over slightly, merge down
Paste Elem34 as new layer, resize to suit & place top left of Frame, paste Elem15b as new layer, resize to suit & place on top of Elem34, merge down
Paste Elem6 as new layer, resize to suit & place left side on top of Tubes leg
Paste Elem12 as new layer, resize to suit & place under Elem on left side at top of frame
Once happy add drop shadow of choice to layers, then copy merged in to Anim Shop, resize 620 then paste back in PSP & sharpen
Paste paper3 as new layer & apply mask of choice
Add name & © then save as PNG!
I hope you enjoyed my Tutorial ♥

~Supplies Needed~
Tube ~ I'm using the awesome artwork of Keith Garvey, the tube I used is FTU & you don't need to use your licence but I always like to give credit. You can find the tube here ~ Garv Girls PSP Tubes
Scrapkit ~ Christmas Cheer Collab PTU by Foxy & Dee here ~ Digi Foxy's Studio or Dees'Sign Depot For this tut I'm using Foxy's part
Filters ~ Xero Radiance, Noise, drop shadow of choice
Font ~ FFF Urban, TwinkleStarROB
~Lets Begin~
New raster layer 800x800
Paste Frame 2 as new layer, resize 70%, click inside with magic wand, expand by 7. New layer & flood fill #38792a, paste paper5 as new layer, resize to suit, invert delete, select none, blend mode screen
Paste Elem13 as new layer on top of paper layer, erase any parts that are outside Frame
Paste Tube as new layer, duplicate & drag below Frame. Hide top tube for now. On bottom tube erase any parts that hang below frame, now hide this tube. UNhide top tube & erase parts that are on top of frame at bottom. So it should now look like tube is coming out of frame. Add Xero radiance - Beauty 100 on both tubes & drop shadow of choice to bottom tube
Add drop shadow of choice to Frame
Paste Elem16 as new layer, resize to suit making sure its centre along bottom of frame
Paste Elem12 on left side of tag on bottom, resize to suit, once happy duplicate & mirror. Do the same with Elem35. Merge them down. Then paste Elem32 on left side & Elem21 on right side. See mine for placement
Paste Elem15 as new layer, resize to suit & place left side of frame above other elements, duplicate mirror, merge down
Paste Elem13 again on top of tube, position & once happy delete any parts that are on bg layer
Now merge visible, duplicate & on orig layer - Texture Effects-Mosaic Antique with orig settings, if needed resize 9o-95% just so you can see it round edges
Paste Elem8 as new layer on top of Mosaic layer, resize to suit & move to right, duplicate mirror, merge down, duplicate flip, merge down add small white drop shadow
*For the above step I added a black layer to bottom of tag so I could see what I was doing then delete once I was happy*
Add drop shadow of choice to rest of layers
Copy merged in to anim shop & resize 620, paste back in PSP & sharpen
Crop tag and add name & © then save as PNG!
I hope you enjoyed my Tutorial ♥
Monday, 4 August 2014

~Supplies Needed~
Tube ~ I'm using the awesome artwork of Verymany, which you need a licence to use & can get here ~ Verymany Tubes
Scrapkit ~ Seaside Rendezvous PTU by Dee here ~ Dees'Sign Depot
Fonts ~ FFF Urban, International Palms
Mask ~ WSL_Mask12 ~ weescotslass creations - links are on right hand side
Drop Shadow of choice
~Lets Begin~
New raster layer 850x850
Paste Frame 7b as new layer, resize 70% 80%, click inside both frames, expand 5, paste paper 17 as new layer, resize 50%, invert delete, drag below, select none. Add drop shadow of choice to Frame
Paste Tube as new layer, resize to suit, duplicate, screen on top tube, merge down, add drop shadw of choice
Paste Elem18 as new layer, drag below Frame & Tube, duplicate few times & arrange so looks like tube is sitting on sand, merge down all sand layers
Paste Elem82 as new layer, mirror, resize to suit & place on bottom left of Frame, duplicate 2 more times and move along bottom of Frame, merge down
Paste Spray 6 as new layer, resize to suit, mirror & place on top of Frames
Paste Elem40 as new layer, place on left side, resize to suit, duplicate & move slightly along, merge down
Paste Elem11 as new layer, resize & place in front of flowers on left
Paste Elem63 as new layer, resize & move along to left just behind Lighthouse
Paste Elem47 as new layer, resize t suit & place on right behind tube
Paste Elem66 as new layer, resize & place behind Frame on right, move down slightly, duplicate mirror & move up (see mine for placement), merge down
Paste Elem38 as new layer, resize to suit & place behind Frame
Make a gradient - FG , #c5cfd8 BG #cbb995, Linear, Angel 45, Repeats 3
New layer at bottom & flood fill with gradient, find mask & apply it, merge group, resize if needed, I moved mine slightly over, duplicated mirrored & flipped, merged down
Copy merged in to Anim Shop & resize, I normally do mine 600/620, paste back in PSP & sharpen
Add drop shadow to rest of layers
Add name & © then save as PNG!
I hope you enjoyed my Tutorial ♥
Subscribe to:
Posts
(Atom)