♥My Blinkies♥


♥I CT For♥

♥Forums♥


♥Blogs I Stalk♥


♥Fav Tube Sites♥


♥Fav Stores♥


Showing posts with label Tooshtoosh. Show all posts
Showing posts with label Tooshtoosh. Show all posts
Tuesday, 29 October 2013

~Supplies Needed~
Tube ~ Im using the awesome artwork of Tooshtoosh, which you need a licence for & can get here ~ Tooshtoosh
Scrapkit ~ Ghouls Night Out PTU here ~ Black Widow Creationz
Template ~ Halloween Mix Temp 11 by Dee here ~ Dangerously Delicious Designz
Filters ~ Xer Radiance, Noise, Gradient Glow
Fonts ~ Oh La La & Zombie Holocaust
~Lets Begin~
Open Temp 11, delete credit & BG layers. Hide wordart. Resize canvas 750x650
Green Circle ~ Select all, float, defloat, paste paper 1 as new layer, resize 80%, invert delete, select none & delete orig layer. Do the same with Orange Oval then do not de-select but invert again then modify expand 3, new layer & flood fill white, drag below & some noise
Orange Square ~ Select all, float, defloat, paste paper 7 as new layer, resize 80%, invert delete, paste tube as new layer on right side, resize to suit, delete, paste Elem 31 as new layer behind tube, resize to suit & delete, select none, Xdero Radiance Beauty 150
Paste Elem7 as new layer, resize 50% & place on top of Purple Circle, paste again, resize 70% & place over Blue Circle
Green Strip ~ Select all, float, defloat, paste paper 2 as new layer, resize 70%, invert delete, selct none & delete orig layer
Purple & Blue Circles ~ Select all, float, defloat, new layer & flood fill #5c3158, select none, delete orig layers
3 Ghosts ~ paste as new layer, drag below Orange Square BG, resize 80% & add fat white gradient glow
Paste Elem32 on left & Elem26 on right, resize to suit & fat white gradient glow to left element
Paste Elem24 as new layer, place behind Elem26 & 32
Paste Elem 36 as new layer, drag to bottom, add fat white gradient glow
Paste Elem6 as new layer, resize 70% & place middle left, duplicate & resize 80% & place slightly over
Add drop shadow to layers, copy merged in to Anim Shop & resize 650, paste back in PSP, sharpen
On the wordart layer i made 'It's a' & 'Night Out' white & added fat purple gradient glow. Also added another fat white glow to the glow thats already there on 'Ghouls' then merged them altogether & c+p on to new tag near bottom adding a drop shadow
Add © & name then save as PNG!
Hope you enjoyed my Tutorial ♥
Tuesday, 16 October 2012

~Supplies Needed~
Tube ~ I'm using 2 tubes from the awesome Tooshtoosh, which you need a licence to use & can get here ~ Tooshtoosh
Scrapkit ~ Em0ween PTU by Danielle here ~ Scraps By Danielle
Template ~ Template179 by Kristin here ~ Toxic Desirez
Filters ~ Xero Porcelain
Fonts ~ Pixel Berry, Chiller
Mask ~ WSL_Mask322 here ~ weescotslass creations
~Lets Begin~
Open Temp179 & delete credit layer
Top Black Square ~ Select all, float, defloat, paste paper 5 as new layer, invert delete, select none, delete orig layer. Do the same with Bottom Black Square
Top Red Circle ~ Select all, float, defloat, new layer & flood fill #ba421f, with your Freehand tool draw around the left SpiderWeb, copy & paste onto Circle, resize 50%, invert delete. Do the same with Bottom Red Circle
Top Round Rect ~ Select all, float, defloat, paste paper 2 as new layer, resize 70%, invert delete, select none, delete orig layer. Do same with Bottom Round Rect
Rect ~ Select all, float, defloat, new layer & flood fill Black, select none, delete orig layer, fat 6, gradient glow #ba421f
Circle ~ Select all, float, defloat, paste paper 7 as new layer, resize 70%, invert delete, paste Spider of choice as new layer, resize to suit, delete, select none, delete orig layer, fat 6, Black gradient glow to Paper layer
Paste Candle as new layer, resize to suit, place at left, duplicate mirror, merge down
Paste Trio Lollipops as new layer, resize to suit & place at left on top of Black Rect
Paste Ghosts as new layer, resize to suit & place at right, duplicate mirror, Xero Porcelain
Paste Witch tube as new layer, resize to suit, mirror, Xero Porcelain
Add drop shadow of choice to layers, copy merged in to Anim shop, resize 550, paste back in to PSP, sharpen
Add new layer under Tag, flood fill Black, layers, new mask layer from image, find mask & apply, merge group, resize 80%, move slightly up to the left, duplicate, mirror, move down slightly on right, add drop shadow of choice ba421f
Add name & © then save as png!
Wednesday, 2 May 2012
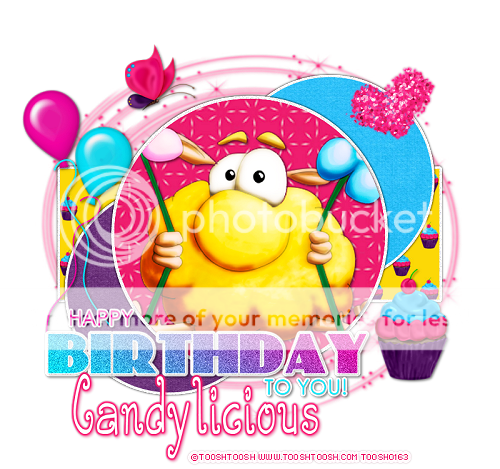
~Supplies Needed~
Tube ~ I'm using the awesome artwork of Toosh Toosh, which you need a licence to use & can get here ~ TooshToosh
Scrapkit ~ Yummie Cupcakes PTU here ~ Candylicious Designz
Template ~ Template 2 by Kristin here ~ Creative Misfits Creations
Filters ~ Xero Radiance
Fonts ~ FFF Urban, DJB Curlie Wurlie
Mask of choice
~Lets Begin~
Open Temp2 by Kristin, resize 800x700, delete white BG & credit layer
Pink Circle ~ Select all, float, defloat, paste paper 3 as new layer, resize 80%, invert delete, select none, delete orig layer
Rectangle ~ Select all, float, defloat, paste paper 15 as new layer, resize 80%, invert delete, select none, delete orig layer
Blue Circle ~ Select all, float, defloat, paste paper 1 as new layer, resize 80%, invert delete, select none, delete orig layer
Black Circle ~ Select all, float, defloat, paste paper 7 as new layer, resize 80%, invert delete, select none, delete orig layer, paste tube as new layer, resize to suit, delete, select none. Xero Radiance on tube
Move Balloons slightly over to left
Birthday wordart resize 110 & move slightly over to left, move above Balloons, add fat white Gradient glow to wordart
Paste Glitter Heart as new layer top right
Paste Cupcake 5 as new layer, resize 50% 70%, place right of wordart
Paste Butterfly as new layer, resize 30%, place beside Balloons at left
Add new raster layer to bottom of palette, flood fill #ef1e6f, apply mask, merge group, flip, add slight drop shadow same colour #ef1e6f
Add name & Copyright then save as PNG!
I hope you enjoyed my Tutorial ♥
Wednesday, 19 October 2011

~Supplies Needed~
Tube ~ I'm using the awesome artwork of TooshToosh, which you need a licence to use & can get here ~ TooshToosh
Scrapkit ~ Spookylicious PTU here ~ Candylicious Designz
Template ~ Temp129 here ~ Punky Butts Productions
Filters ~ Xero Porcelain
Fonts ~ FFF Urban & Disgusting Behaviour
~Lets Begin~
Open Temp129 & delete credit layer, resize canvas 900x800
Top Right Square ~ Select all, float, defloat, paste paper 14 as new layer, resize 80%, invert delete, select none, delete orig layer
Left Square ~ Select all, float, defloat, paste paper 19 as new layer, resize 80%, invert delete, select none, delete orig layer. Do the same with Right Square
Strip ~ Select all, float, defloat, new raster layer & flood fill #48c708, select none, delete orig layer. Do the same with Large Circle
Circle Left ~ Select all, float, defloat, paste paper 19 as new layer, resize 80%, invert delete, paste the Scary Spider as new layer, delete, select none, delete orig layer. Do the same with Circle Right for the paper. Duplicate the Scary Spider & mirror
Center Circle ~ Select all, float, defloat, new raster layer & flood fill #480b96, paste the Happy Spider as new layer, invert delete, select none, delete orig layer
Add Xero Porcelain to Spiders
Cat2 ~ Paste as new layer, resize 70%, place to right of canvas
Doodle 1 ~ Paste as new layer, resize 70% place top left of canvas, drag to bottom of palette, duplicate, mirror, flip, merge down
Paste Witch tube as new layer, resize if needed, mirror, place near left side of canvas, Xero Porcelain
Add drop shadow of choice to layers
Copy merged in to Anim Shop, resize 600, paste back in PSP, sharpen
Add © & name then save as PNG!
I hope you enjoyed my Tutorial ♥
Monday, 31 January 2011


~Supplies Needed~
Tube ~ I'm using the awesome artwork of Tooshtoosh, which you need a licence to use & can get here ~ Tooshtoosh
Font ~ RaveParty Bold
Filters ~ MuRa's Meister Copies
~Lets Begin~
New raster layer 600x250, paste tube as new layer in center, MuRa's Meister copies, wallpaper rotate default, motion blur - Angel 45, strength 100, edge effects enhance twice, edge effects erode.
Paste tube again to the right, resize if needed, opacity 60
Paste larger tube, mirror, move to left, add drop shadow of choice
Paste Hearts few times on canvas, adjust add some noise, add drop shadow
click crop tool, on the right hand side of tool bar you should see 'snap crop rectangle to' with 3 icons underneath, click the last one which is merged opaque, click green tick on the left, this just crops any extra bits of the tube,
Highlight background layer, select all, float, defloat, modify, select selection borders - inside 5, new layer flood fill #931515, adjust add some noise, add drop shadow, i used 1 1 50 5 & -1 -1 50 5
Now do the exact same for the avatar, except i didnt add any Hearts & for the border - inside 3
Add ©, name & save as PNG!
I hope you enjoyd my tutorial ♥
Subscribe to:
Posts
(Atom)