♥My Blinkies♥


♥I CT For♥

♥Forums♥


♥Blogs I Stalk♥


♥Fav Tube Sites♥


♥Fav Stores♥


Monday, 10 February 2014
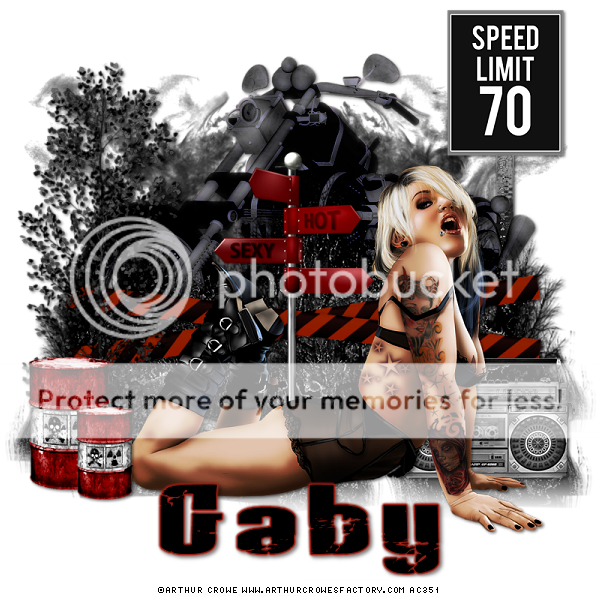
~Supplies Needed~
Tube ~ I'm using the awesome artwork of Arthur Crowe, which you need a licence to use & can get here ~ Arthur Crowe's Factory
Scrapkit ~ Black Boot Bikini PTU by Gaby ~ Scraps N Company
Filters ~ Xero Porcelain & Radiance
Fonts ~ Oh La La, Rock It
~Lets Begin~
New raster layer 800x800
Paste Elem063 as new layer, duplicate mirror, move slightly up, merge down
Paste Elem064 as new layer, resize 80% & place on left
Paste tube as new layer, resize to suit, Xero Radiance - Beauty 150
Paste Elem058 as new layer,behind Tube, resize to suit
Paste Elem018 as new layer on left, resize to suit, duplicate & resize 80%, move slightly over & merge down
Paste Elem056 as new layer, move behind Elem063, Xero Porcelain
Paste Elem087 as new layer, place in front of Elem063, resize 90%
Paste Elem078 behind Tube on right
Paste Elem057 as new layer, on right behind Motorbike
Paste Elem093 as new layer, resize 50% & place top left bottom of palette, duplicate mirror, merge down
Add drop shadow of choice to layers
Copy merged in to Anim shop & resize 600, paste back in PSP, sharpen
Add name & © then save as PNG!
I hope you enjoyed my Tutorial! ♥
Subscribe to:
Post Comments
(Atom)
0 comments:
Post a Comment